In high-volume metal cutting facilities, the band saw is often the first machine to start running in the morning and the last to shut down at night. That relentless duty cycle makes safety and maintenance not optional protocols but survival imperatives. A single missed blade inspection can send a shattered bi-metal strip across the shop floor at 80 meters per second. A neglected coolant system can turn a clean cut into a workpiece-scorching, blade-destroying mess that costs thousands in scrapped material and downtime.
Yet many operations treat band saw safety as an annual training checkbox rather than a daily discipline. The result? According to OSHA, inadequate machine guarding and insufficient operator training remain among the top ten most frequently cited safety violations in metal fabrication. The band saw, with its exposed cutting edge and high-tension blade, sits squarely at the intersection of both.
This guide consolidates 20 essential band saw safety and maintenance checks into three operational phases: pre-operation, active cutting, and post-operation. Each check includes specific acceptance criteria, common failure modes, and corrective actions so that operators, shift supervisors, and plant managers can implement them immediately. Whether you are running a scissor-style semi-automatic band saw or a fully automatic CNC band saw, these checks apply universally.
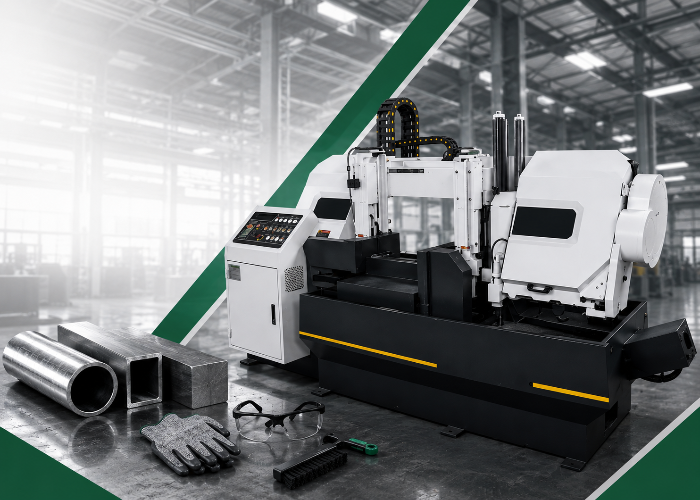
Before the blade spins, seven checks must be completed and logged. These pre-operation checks catch 80% of potential safety incidents before they occur, according to incident data from manufacturing safety audits. Each item below follows the format used by OSHA-compliant facilities under 29 CFR 1910.213(i).
1. Read the Manual and Verify Operator Training Certification
Every operator must review the manufacturer’s operating manual for the specific machine model before initial use and during annual refresher training. Band saws differ significantly in their guarding configurations, emergency stop locations, and blade change procedures. A operator trained on a semi-automatic band saw may not be familiar with the automated stock feed cycle on a CNC model. Verify that each operator’s training record is current and covers the specific machine they are assigned to operate.
2. Inspect the Band Saw Blade for Damage, Cracks, and Tooth Wear
Remove the blade guard and visually inspect the entire blade length under adequate lighting. Look for hairline cracks at the tooth gullets, missing or chipped teeth, weld joint integrity, and uneven tooth set. A blade with cracks longer than 1 mm at the gullet is a catastrophic failure waiting to happen, as centrifugal force at operating speed will propagate the crack rapidly. Replace any blade showing visible damage immediately. For a detailed cost analysis of premature blade failure, see our article on band saw blade performance and cost comparison.
3. Verify Blade Tension with a Calibrated Tension Meter
Blade tension is not a set-and-forget specification. Thermal cycling, blade fatigue, and mechanical wear all cause tension to drift. Use a calibrated blade tension meter to verify that tension falls within the manufacturer’s specified range, typically 250–330 N/mm² for bi-metal and carbide-tipped blades. Too little tension causes blade wander, crooked cuts, and accelerated tooth wear. Too much tension overstresses the blade back edge, shortens blade life, and can cause catastrophic blade breakage. Record the tension reading in the maintenance logbook each time the blade is changed or adjusted.
4. Check Blade Tracking on the Band Wheels
Rotate the wheels by hand (with the machine powered off and locked out) and observe the blade position on the wheel crown. The blade must track centered on the wheel surface with the back edge approximately 1–2 mm from the wheel flange. If the blade touches the flange, it will develop back-edge wear and eventually crack. If it tracks too far from the flange, it may derail during operation. Adjust the tracking adjustment screw per the manufacturer’s procedure until the blade runs true.
5. Inspect and Adjust Blade Guides
Blade guides control lateral and back-edge movement during cutting. Two types are common: carbide-faced guides and roller bearing guides. For carbide guides, verify that the carbide insert sits slightly higher than the steel holder and shows no cracks or chips on the contact surface. For roller bearing guides, spin each bearing by hand to confirm smooth rotation without play. Set the side clearance to 0.02–0.05 mm (the thickness of a feeler gauge) and the back clearance to just touch the blade back edge. Worn or misaligned guides cause blade vibration, crooked cuts, and premature tooth failure.
6. Verify Coolant Flow and Concentration
Start the coolant pump and verify that fluid flows freely from all nozzles and ports. Check the concentration using a refractometer: 7% minimum for bi-metal blades and 10% minimum for carbide-tipped blades. Insufficient coolant causes thermal buildup at the tooth tips, accelerating wear and producing work-hardening on the cut surface. Contaminated coolant (mixed with chips or tramp oil) reduces cooling efficiency and can leave rust-preventive residues on the workpiece. Drain and replace coolant that appears milky, discolored, or has not been changed in over six months.
7. Confirm PPE Compliance for All Personnel in the Area
Personal protective equipment is the last line of defense when engineering controls fail. Verify that every person in the sawing area wears: safety glasses with side shields (ANSI Z87.1 rated), hearing protection rated for 85+ dB exposure (band saws at high speed can exceed 90 dB), cut-resistant gloves rated ANSI A4 or higher for blade handling only (gloves must NOT be worn during active cutting on manual-feed saws), steel-toe footwear, and snug-fitting clothing with no loose sleeves, jewelry, or lanyards. For operations cutting materials that generate fine particulate matter, add a properly fitted N95 or P100 respirator.
Pre-Operation Tip: These seven checks take 10–15 minutes per shift. A single prevented blade breakage incident saves an average of 4 hours of downtime, replacement blade cost, and potential injury report filing. The ROI of a daily pre-operation checklist is measurable from day one.
Explore KEENSAW Band Saw Products
Once the machine is running, the operator’s focus shifts from inspection to active monitoring. These seven checks address the highest-risk phase of band saw operation, where blade speed, feed force, and material behavior interact dynamically.
8. Secure the Workpiece in Clamps or Vise Before Initiating the Cut
An unsecured workpiece is the single most common cause of band saw injury. Verify that the material is clamped on both sides of the cut line with sufficient force to resist the cutting force vector. For round stock, use V-blocks or a chain clamp to prevent rotation. For bundle cutting, ensure all bars are secured against lateral movement. On automatic saws with hydraulic clamping, verify that clamp pressure reaches the manufacturer’s specified value before the cutting cycle begins. Never hand-hold material during a cut on any industrial band saw.
9. Set Correct Blade Speed for the Material Being Cut
Blade speed, measured in surface feet per minute (SFPM) or meters per minute (m/min), must match the material’s hardness and thermal properties. Running a blade too fast on hard material causes instantaneous tooth damage; too slow on soft material causes chip welding and gumming. As a starting reference: mild steel runs at 60–90 m/min, stainless steel at 20–40 m/min, aluminum at 200–500 m/min, and titanium at 15–25 m/min with bi-metal blades. Always consult the blade manufacturer’s speed chart and adjust based on actual cutting performance. For material-specific speed guidance, see our complete RPM guide for aluminum sawing.
10. Adjust Downfeed Rate to Material Specifications
Downfeed rate, measured in mm/min, determines how quickly the blade penetrates the workpiece. Too fast overloads the teeth and strips them; too slow causes rubbing that work-hardens the material and dulls the blade. The correct rate produces chips that curl cleanly and fall away. If chips are fine and powdery, increase the feed. If chips are thick and the blade sounds labored, decrease the feed. On programmable saws like the KEENSAW BSV7050CNC, the feed rate adjusts automatically based on motor load feedback. On manual saws, maintain steady hydraulic downfeed pressure without forcing.
11. Maintain Safe Hand Positioning and Use Push Sticks
On manual-feed band saws, the operator’s hands must never come closer than 150 mm (6 inches) to the blade during cutting. Use a push stick or feed arm to guide material through the final portion of the cut. Never reach across the blade to retrieve offcuts. On horizontal band saws, keep hands clear of the saw head descent path and the clamp mechanism. Position the operator station so that the body is offset from the blade plane, not directly in line with potential blade breakage trajectory.
12. Monitor Cutting Sound and Vibration Continuously
An experienced operator can detect 90% of cutting problems by sound alone. A properly cutting band saw produces a steady, moderate-pitched humming sound. Changes in pitch, rhythmic thumping, or high-pitched squealing indicate specific problems: high-pitched squeal means the blade is rubbing without cutting (feed too light); thumping means the blade is bouncing on the material (tension too low or guides worn); a sudden bang means a tooth has broken off. Train operators to stop the machine immediately when the sound changes and diagnose the cause before resuming.
13. Keep the Work Area Clear of Chips, Debris, and Obstructions
Metal chips accumulate rapidly during high-volume cutting and create multiple hazards: slip and fall risk, fire hazard (especially with magnesium or titanium fines), and blade damage if chips are drawn back into the cutting zone. Use a chip conveyor or vacuum system to remove chips continuously during operation. Never clear chips by hand while the machine is running. Maintain a minimum 1-meter clearance around the machine for safe operator movement and emergency access.
14. Know the Emergency Stop Location and Protocol
Every operator must be able to locate and activate the emergency stop (E-stop) button without looking, by muscle memory alone. Verify that the E-stop is functional before each shift by pressing it during the pre-operation check (with no material in the saw). The blade should come to a complete stop within 5–10 seconds. If the machine has a brake system, verify that it engages properly. On machines with automatic feeds, confirm that the E-stop also halts the stock feed and clamp release cycles.
The work is not finished when the last cut is made. Post-operation checks and preventive maintenance determine whether your band saw starts up reliably the next morning or sits idle waiting for a service technician. These six checks establish a maintenance rhythm that extends machine life by years and prevents the majority of unplanned downtime events.
15. Clean the Machine Thoroughly After Each Shift
Remove all chips from the cutting zone, chip pan, and chip conveyor. Use compressed air (with eye protection) or a vacuum to clear the blade guides, wheel housing, and coolant nozzles. Wipe down the machine table, vise jaws, and control panel with a clean rag. Apply a light coat of way oil to bare metal surfaces to prevent rust, especially in humid environments. A clean machine makes the next shift’s pre-operation inspection faster and more effective, because damage and wear are visible rather than hidden under chip buildup.
16. Inspect and Replace the Chip Brush as Needed
The chip brush clears chips from the blade gullets as the blade exits the workpiece, preventing chip recutting that dulls teeth and causes crooked cuts. Inspect the brush bristles for wear, melting, or contamination. A worn chip brush allows chips to pack into the gullets, reducing cutting efficiency by up to 30% and accelerating tooth damage. Replace the chip brush when bristle length is less than 50% of the original length or when bristles show signs of heat damage (discoloration or melting).
17. Check Hydraulic Fluid and Lubrication Levels
Verify hydraulic fluid level in the saw’s reservoir (for machines with hydraulic downfeed or clamping systems). Check the oil level in all air oilers and the gearbox. Low hydraulic fluid causes erratic downfeed, which produces inconsistent cut quality and can damage the hydraulic pump. Low gearbox oil leads to gear overheating and premature failure. Top off fluids to the manufacturer’s specified levels using the correct grade. Record fluid consumption in the maintenance log; a sudden increase in fluid usage indicates a leak that requires investigation.
18. Inspect Drive Belts, Gearbox, and Drive Mechanics
With the machine powered off and locked out, inspect all drive belts for fraying, cracking, or glazing. Check belt tension per the manufacturer’s specification. Listen for unusual gear or bearing sounds during the last cutting cycle of the shift. Grinding, whining, or knocking sounds from the gearbox indicate bearing wear or gear damage that will progress to failure if not addressed. Check for fluid leaks around the gearbox seals and drive shafts. Any leak, no matter how small, should be reported and scheduled for repair.
19. Record All Checks and Maintenance in the Machine Logbook
Every pre-operation check, blade change, tension adjustment, fluid top-off, and observed anomaly must be recorded in the machine logbook. This record serves three purposes: it creates a traceable history for warranty and compliance audits, it enables trend analysis to predict component failures before they occur, and it provides continuity across shift changes so that the incoming operator knows the machine’s current condition. A well-maintained logbook is the single most valuable document in a preventive maintenance program.
20. Schedule Professional Service at Defined Intervals
Daily and weekly checks cover 80% of maintenance needs, but certain tasks require a qualified service technician. Schedule professional service annually (or every 2,000 operating hours, whichever comes first) for: wheel alignment verification using dial indicators, gearbox oil change and internal inspection, hydraulic system pressure testing and filter replacement, electrical system inspection including motor winding resistance testing, and machine geometry verification (table flatness, column perpendicularity, vise alignment). For KEENSAW machines, contact our service team to schedule a professional inspection.
Maintenance ROI: Facilities that implement a structured daily-to-annual maintenance schedule report 40–60% fewer unplanned downtime events and 20–30% longer blade life compared to reactive maintenance programs. The labor cost of preventive maintenance is typically 1/5 the cost of emergency repairs plus lost production time.
The following checklist consolidates all 20 checks into a single-page format that operators can print, laminate, and attach to each machine. Check each item before starting the shift, during active monitoring, and after shutdown.
| # | Check Item | Acceptance Criteria | Frequency | Pass / Fail |
|---|---|---|---|---|
| 1 | Training verification | Operator certified for machine model | Per shift | ☐ ☐ |
| 2 | Blade visual inspection | No cracks, missing teeth, or weld defects | Per shift | ☐ ☐ |
| 3 | Blade tension | 250–330 N/mm² (per blade spec) | Per shift | ☐ ☐ |
| 4 | Blade tracking | Centered on wheel, 1–2 mm from flange | Per shift | ☐ ☐ |
| 5 | Blade guides | No cracks/chips; 0.02–0.05 mm clearance | Per shift | ☐ ☐ |
| 6 | Coolant flow & concentration | All nozzles flowing; 7% bi-metal / 10% carbide | Per shift | ☐ ☐ |
| 7 | PPE compliance | Z87.1 glasses, hearing protection, steel-toe | Per shift | ☐ ☐ |
| 8 | Workpiece clamping | Secured on both sides; no movement | Each cut | ☐ ☐ |
| 9 | Blade speed setting | Matches material per blade chart | Each material | ☐ ☐ |
| 10 | Downfeed rate | Clean curling chips; no laboring sound | Continuous | ☐ ☐ |
| 11 | Hand positioning | Greater than 150 mm from blade | Continuous | ☐ ☐ |
| 12 | Sound & vibration monitor | Steady hum; no thumping or squealing | Continuous | ☐ ☐ |
| 13 | Work area clearance | 1-meter clearance; chips removed | Continuous | ☐ ☐ |
| 14 | E-stop functional test | Blade stops within 5–10 seconds | Per shift | ☐ ☐ |
| 15 | Post-shift cleaning | All chips removed; way oil applied | Per shift | ☐ ☐ |
| 16 | Chip brush condition | Bristles greater than 50% original length | Weekly | ☐ ☐ |
| 17 | Fluid levels | Hydraulic, gearbox, air oiler at spec | Weekly | ☐ ☐ |
| 18 | Drive belts & gearbox | No fraying/cracks; no unusual sounds | Monthly | ☐ ☐ |
| 19 | Maintenance logbook | All checks recorded and signed | Per shift | ☐ ☐ |
| 20 | Professional service | Annual or 2,000 hours completed | Annual | ☐ ☐ |
Use the following schedule as a baseline and adjust based on your machine’s operating intensity, material mix, and environmental conditions. Facilities running multiple shifts or cutting abrasive materials should compress the intervals accordingly.
| Frequency | Maintenance Tasks | Responsible Party |
|---|---|---|
| Each Shift | Blade inspection, tension check, tracking verification, coolant concentration, PPE check, E-stop test, post-shift cleaning | Machine operator |
| Weekly | Chip brush inspection, fluid level check, guide clearance verification, wheel tire inspection, safety guard function test | Operator + shift supervisor |
| Monthly | Drive belt inspection, gearbox sound check, wheel bearing play test, table squaring (90°), hydraulic system leak check, coolant pH test | Maintenance technician |
| Quarterly | Coolant system drain and refill, hydraulic filter replacement, guide replacement (if worn), blade wheel alignment check | Maintenance technician |
| Annual / 2,000 hrs | Gearbox oil change, wheel alignment with dial indicators, motor winding resistance test, electrical system inspection, machine geometry verification, drive belt replacement | Qualified service engineer |
For operations managing multiple KEENSAW machines, our team can help establish a structured maintenance program tailored to your production schedule. Contact KEENSAW to discuss preventive maintenance planning for your facility.
Q1: What PPE is required for operating a band saw in metal cutting operations?
A1: OSHA requires operators to wear ANSI Z87.1 safety glasses with side shields, hearing protection rated for the machine’s noise level (typically 85+ dB), steel-toe footwear, and snug-fitting clothing without loose sleeves or jewelry. Cut-resistant gloves (ANSI A4+) should be worn during blade handling and machine setup but must NOT be worn during active cutting on manual-feed saws, as gloves can be caught by the blade. For materials generating fine particulates, add a properly fitted N95 or P100 respirator.
Q2: How often should band saw blades be inspected for damage?
A2: Band saw blades must be visually inspected at the start of every shift, before the first cut. The inspection should cover the entire blade length for cracks at the tooth gullets, missing or chipped teeth, weld joint integrity, and uneven tooth set. Any blade with cracks longer than 1 mm at the gullet must be replaced immediately. Additionally, monitor blade performance during cutting: if cut quality deteriorates or the blade produces unusual sounds, stop and inspect the blade mid-shift.
Q3: What is the correct blade tension for a metal cutting band saw?
A3: The correct blade tension for bi-metal and carbide-tipped blades is typically 250–330 N/mm², depending on the blade width, thickness, and machine type. Always verify tension using a calibrated blade tension meter rather than relying on the machine’s tension indicator dial, which can drift over time. Too little tension causes blade wander and crooked cuts; too much tension shortens blade life and risks catastrophic breakage.
Q4: How do I safely operate a horizontal band saw?
A4: Safe horizontal band saw operation requires: securing the workpiece in the vise or clamps before starting the cut, setting the correct blade speed for the material, adjusting the downfeed rate to produce clean curling chips, maintaining a safe distance from the blade and saw head descent path, monitoring cutting sound for anomalies, keeping the work area clear of chips, and knowing the E-stop location. Never reach into the cutting zone while the blade is moving. For machine-specific procedures, always follow the manufacturer’s operating manual.
Q5: What is the minimum coolant concentration for band saw cutting?
A5: The minimum coolant concentration depends on the blade type: 7% for bi-metal blades and 10% for carbide-tipped blades. Verify concentration using a refractometer at the start of each shift. Insufficient coolant causes thermal buildup at the tooth tips, accelerating wear and producing work-hardening on the cut surface. Contaminated coolant should be drained and replaced when it appears milky, discolored, or is over six months old.
Q6: How often should I perform preventive maintenance on an industrial band saw?
A6: Industrial band saws require a tiered maintenance schedule: daily checks (blade, tension, coolant, PPE, E-stop, cleaning), weekly checks (chip brush, fluid levels, guide clearance, wheel tires), monthly checks (drive belts, gearbox, wheel bearings, table squaring, hydraulic leaks), quarterly tasks (coolant replacement, filter changes, guide replacement), and annual service (gearbox oil change, wheel alignment, motor inspection, geometry verification). Facilities running multiple shifts should compress these intervals proportionally.
Q7: What are the most common band saw safety violations in metalworking facilities?
A7: The most common violations are: removing or bypassing blade guards, operating without proper PPE, hand-feeding material without a push stick near the blade, failing to secure the workpiece adequately, leaving loose clothing or jewelry exposed, not testing the E-stop regularly, and skipping blade inspections. OSHA cites these under 29 CFR 1910.212 (general machine guarding) and 29 CFR 1910.213(i) (specific band saw guarding requirements).
Q8: Can I wear gloves when operating a band saw?
A8: This depends on the machine type. On manual-feed band saws where the operator’s hands are near the blade, gloves should NOT be worn during active cutting because the blade can catch glove material and pull the hand in. Cut-resistant gloves should be worn during blade handling, blade changes, and machine setup. On fully automatic CNC band saws where the operator does not manually feed material, gloves may be worn for material loading and unloading, but not near the cutting zone.
Q9: What should I do if the band saw blade breaks during operation?
A9: If a blade breaks during cutting: immediately press the E-stop button, keep hands away from the cutting zone as the broken blade may still be moving, wait for all moving parts to stop completely, lock out and tag out the machine, inspect the blade, guides, and wheels for damage that may have caused the breakage, replace the blade, verify tension and tracking, and record the incident in the maintenance logbook. Investigate the root cause (excessive tension, worn guides, hard spot in material) before resuming production.
Q10: How do I know when to replace a band saw blade?
A10: Replace a band saw blade when you observe any of these signs: visible cracks at the tooth gullets (especially cracks longer than 1 mm), missing or chipped teeth, crooked cuts that cannot be corrected by tension or guide adjustment, a burning smell during cutting, excessive vibration or noise, rough or uneven cut surfaces, or when the blade has been in service beyond its expected life (which varies by material and cutting intensity). For a cost analysis of premature blade replacement, see our guide on band saw blade performance comparison.
Existing KEENSAW Blog Posts:
Recommended Future Blog Topics:
Contact us if you have any questions we will reply as soon aspossible